
I am a huge fan of Proxmox, I use it as my Type-1 hypervisor; however I travel frequently for my job and don’t always access to VPN back into my network. I’ve brought up this point several times and it continues to be true. I originally ran a NGINX reverse proxy to access my Proxmox remotely; however, when I switched to pfSense I started using haProxy.
I had some major issues with haProxy and Proxmox. I could connect to the admin interface and access a VM over noVNC but the VMs would disconnect constantly. I needed a different solution so I started looking at Cloudflare tunnels, originally called Argo tunnels.
Setting up Cloudflare took a few steps to get working but once it’s set up it worked great. So lets walk through it.
Step 1: Install Cloudflared
SSH into your Proxmox server and downloand the cloudflared deb package.
wget -q https://github.com/cloudflare/cloudflared/releases/latest/download/cloudflared-linux-amd64.deb && dpkg -i cloudflared-linux-amd64.debAfter that you will need to login with your Cloudflare account
cloudflared tunnel loginRunning this command will provide you a link that you will need to copy and paste into your web browser.
Next you will need to create a tunnel
cloudflared tunnel create <NAME>The name can be anything you want. When the command is run it will generate a UUID. Copy this UUID and store it for later. You will need it.
Step 2: Create a config.yml file
After creating the tunnel you will want to create a config.yml file.
nano ~/.cloudflared/config.ymlThis file will likely be blank so you will have to configure it by hand. Put in the blow and replace the sections in <> without the brackets.
tunnel: <UUID>
credentials-file: /root/.cloudflared/<UUID>.json

ingress:
  - hostname: <domain>
    service: https://localhost:8006
    originRequest:
       disableChunkedEncoding: true
       noTLSVerify: true
  - service: http_status:404
Most of this is pretty self explanatory but I want to explain the two parts under originRequest.
disableChunkedEncoding
I’m not 100% sure why Proxmox uses Chunked Encoding but I can confirm through my testing that omitting this command will prevent you from being able to Start/Stop VMs through the tunnel. Cloudflare tunnels do not support HTTP Chunked Encoding.
noTLSVerify
Since Proxmox has a self signed SSL cert you need to tell Cloudflare to ignore that cert and no attempt to verify it’s authenticity against a CA.
Step 3: Create a CNAME request
You need to create a CNAME request for the tunnel. Thankfully you can do that through the command line now.
cloudflared tunnel route dns <UUID> <hostname>Step 4: Run the tunnel
cloudflared tunnel run <UUID>Step 5: Set up Cloudflare Access
I’ve talked about setting up Cloudflare Access before and it’s still my recommendation for anyone looking to limit access to online resources.
Option Step 6: Configure Spice
Everything up to this point should just work. You should have access to the admin page, be able to start/stop/create VMs, and load a VM through noVNC; however, you won’t be able to use SPICE over the internet. Connecting to the internal IP will still work but trying to connect to SPICE over the internet will not work.
You can fix this by modifying the SPICE port in the proxmox config files and setting it to something that Cloudflare will proxy like port 8880. If you want to do this then modify the following files and lines;
/usr/share/perl5/PVE/HTTPServer.pm:    my $remport = $remip ? 3128 : $spiceport;
/usr/share/perl5/PVE/AccessControl.pm:    proxy => "http://$proxy:3128",
/usr/share/perl5/PVE/Service/spiceproxy.pm:    my $socket = $self->create_reusable_socket(3128, undef, $family);
/usr/share/perl5/PVE/Service/spiceproxy.pm:SPICE proxy server for Proxmox VE. Listens on port 3128.
/usr/share/perl5/PVE/API2Tools.pm:    my $port = $uri->port || 3128;
You will also need to modify the TLS auth port so that SPICE can create a secure connection. That port should also be in the files above.
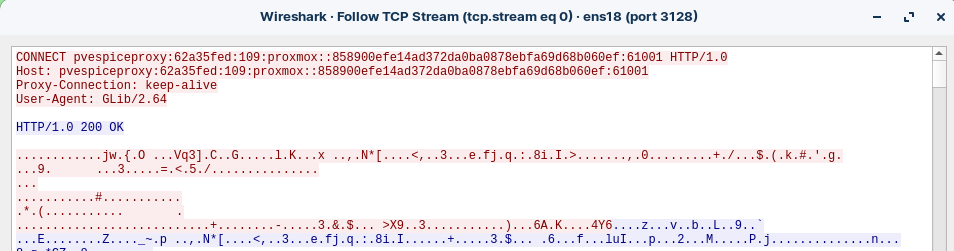
The SPICE connection is encrypted but the initial connection attempt is plaintext.
Problem with this
You will need to create a Cloudflare access rule which allows your home IP to bypass Access as the SPICE connection as the Virt-Viewer client cannot complete the Access OAuth challenge.
This will cause problems if you are trying to access VMs over SPICE remotely. I have yet to figure out how to actually solve this so when I need to access my VMs remotely and can’t use a VPN I will stick with noVNC only.
Inside my house I have a port redirection to send port 3128 to my Proxmox host instead of over the internet. This means that even using my public URL for Proxmox the Spice connection always gets redirected back inside the network.
Conclusion
I wanted to document this process because I couldn’t find anything that actually walked though setting this up. Hopefully this is helpful to someone.